How to trade with EMA indicator: Formula & crossover strategy

Looking for a way to master trend trading with the EMA indicator? In this guide, trading expert Michael Stark explains the EMA formula and moving average crossover strategy to help you identify precise entry and exit points.
Along with the SMA (Simple Moving Average) and SMMA (Smooth Moving Average), I’ve found the EMA (Exponential Moving Average) indicator to be one of the most reliable tools for tracking recent price data and capturing short-term market momentum. In this guide, I’ll walk you through how I use it in my own trading—explaining the EMA formula, how I apply moving average crossover strategies, and the method I use to identify potential entry and exit points with greater precision.
From my experience, the Exponential Moving Average (EMA) offers a faster, more responsive view of the market than the SMA. While the SMA gives equal weight to all prices within a given period, the EMA places greater weight on the most recent data points, making it far more reactive to current price movements. For active and short-term traders, this sensitivity to change makes the EMA a powerful ally for spotting momentum shifts and trend reversals early—often before the rest of the market catches on.
Content
- What is the EMA Indicator?
- EMA formula explained
- EMA crossover strategy basics
- How I use EMA in practice
- Best EMA settings for different trading styles
- EMA crossover strategy example: Crypto trade walkthrough
- Tips for using EMA effectively
- Is an EMA strategy right for you?
- Key takeaways
- Final thoughts on mastering EMA trading
What is the EMA Indicator?
So, what exactly is the EMA indicator? It’s a technical analysis tool that calculates the average price of an asset while giving more weight to recent prices.

EMA vs SMA
With the above chart in mind, the EMA is clearly more responsive than the SMA, reducing lag and giving equal weight to all data points in the selected period. This makes it particularly useful for short-term trading and spotting momentum shifts, while the SMA is often preferred for longer-term trend analysis.
Why traders prefer EMA
For day traders in forex, crypto, and stocks, the EMA is highly effective, giving that little bit of extra responsiveness to price movements that can help identify short-term trends and momentum shifts. However, understanding the formula you use to calculate it accurately won’t hurt you.
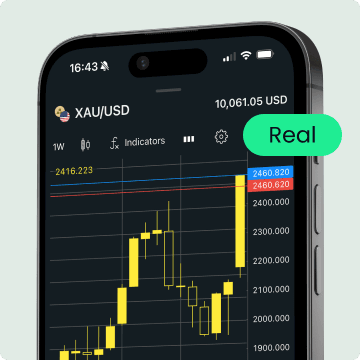
Exness Trade app
Trade with confidence anytime, anywhere.
EMA formula explained
The formula for EMA is:
- EMA_Today = (Value_Today × (1 + Days / Smoothing)) + EMA_Yesterday × (1 − (1 + Days / Smoothing))
The EMA calculation step-by-step
In terms of how it works, you start by choosing the period you want, for example, a 10-period EMA. You then calculate the multiplier using the formula: Moving average formula 2 / (Period + 1), which in this case is 2 / (10 + 1) = 0.1818.
After this, you calculate an initial simple moving average using the first 10 closing prices, then apply the EMA formula for each subsequent day.
By repeating this process for each day, the EMA incorporates the most recent price with greater weight while still considering the overall trend, allowing it to react faster to short-term price changes while smoothing out older data.
Common EMA periods to use
We used a 10-period EMA for that calculation, but there are numerous others you can use. A 9-period EMA, for instance, will capture very short-term momentum and quick price changes. Meanwhile, the 21-period EMA will provide a slightly broader view, while the 50-period EMA is widely used for medium-term trend analysis. Finally, the 200-period EMA is favoured by long-term traders and investors, as it highlights the overall market trend and major support or resistance levels.
EMA smoothing factor
The last thing you need to know about the EMA formula is the smoothing factor, often represented by α. This determines how much weight is given to price data, with a higher α giving more weight to recent prices, and a lower α smoothing out the data to reduce sensitivity. By understanding this, you can work to adjust your EMA more precisely, ensuring it matches your trading style and timeframe. This level of customization is particularly valuable for traders focused on defining a consistent trading strategy that aligns with their preferred timeframe and risk tolerance.
EMA crossover strategy basics
Speaking of your trading style, a moving average crossover strategy can be adapted to suit both short-term and long-term approaches, and it’s one of the most popular strategies used today. Essentially, it involves combining two EMAs to signal trade entries and exits, with one EMA being short-term, and the other, long-term.

Golden cross with EMA
What you’re looking for is a golden cross and a death cross. A golden cross occurs when the fast EMA crosses above the slow EMA, indicating an uptrend and a potential buying opportunity.
Death cross with EMA
A death cross, on the other hand, occurs when the fast EMA crosses below the slow EMA, indicating that the market is entering a downtrend and a potential selling or exit opportunity.
Filtering false crossovers
Not every golden or death cross is accurate, which is why it’s crucial to use trend confirmation tools, like RSI and MACD, to avoid whipsaws. Traders who maintain emotional discipline and clear decision-making under pressure often interpret market trends more accurately.
How I use EMA in practice
There’s a range of information that an EMA can give you, from trend confirmation to identifying potential reversals. Using it in practice should, therefore, be systematic and determined by how you’re looking to align your trades with the overall market trend.
EMA as dynamic support and resistance
In trending markets, the EMA can act as a dynamic support or resistance level. When the price is in an uptrend, for instance, it often bounces off the EMA line, using it as a support before continuing higher. Conversely, in a downtrend, the EMA can act as resistance, where price briefly rallies towards the EMA before resuming the decline.
EMA for trend confirmation
EMAs are also useful for confirming the strength and direction of a trend. For instance, if the price consistently stays above the 50-period EMA during an uptrend, it signals that the trend is intact and can justify holding buys. Similarly, if the price remains below the EMA in a downtrend, traders might keep sells open.
EMA crossovers for entry and exit
As mentioned, EMA crossovers are also a powerful way to time trade entries and exits, so long as you monitor the trends closely and use alternative indicators to back up your decisions. For instance, you can enter when a 9-period EMA crosses the 21-period EMA, and exit when the trend weakens and the RSI and the MACD indicator start showing divergence or overbought/oversold conditions.
Best EMA settings for different trading styles
In terms of trading styles and timeframes, there are numerous different EMA settings to try out, each of which will affect how quickly the indicator reacts to the market.
Day trading with 9 and 21 EMA
A 9-period or 21-period EMA will provide fast signals for scalping and intraday momentum trades, enabling you to identify short-term trend changes and react to price movements in real-time.
Swing trading with 50 EMA
For swing traders, however, a 50-period EMA will help to identify medium-term trends and pullback entries, giving you a clearer view of the prevailing trend and helping you enter trades at points where the price temporarily retraces.
Long-term trading with 200 EMA
When it comes to long-term trading, this is typically done with a 200-period EMA, using it as a big-picture trend filter that can help determine the overall market direction.
EMA period | What it shows | Best for |
9-Period EMA | Very short-term momentum | Day trading, scalping, and intraday trades. |
21-Period EMA | Short-term trend | Day trading, scalping, and intraday trend following. |
50-Period EMA | Medium-term trend | Swing trading and position trading. |
200-Period EMA | Long-term trend | Long-term investing and trend filtering. |
EMA crossover strategy example: Crypto trade walkthrough
With all of this in mind, let’s look at an example of an EMA crossover in action, using a crypto pair like BTCUSD.
- Step 1: Identify 9 EMA crossing above 21 EMA
Start by applying both a 9-period EMA and a 21-period EMA, then identify when the short-term EMA crosses above the long-term one.

- Step 2: Confirm with RSI > 50
Make sure you confirm the buy signal with RSI, then consider buying.

- Step 3: Exit when EMA lines flatten or cross back
Once this is done, monitor the EMAs and RSI, and consider exiting when the 9-period EMA crosses back below the 21-period EMA, or when the RSI starts showing signs of weakness, such as dropping below 50 or forming bearish divergence with the price.

Tips for using EMA effectively
The example above is an indication of how you can use EMA, but whether you’re using it in the crypto market, forex market, or anywhere else, there are a few things to bear in mind if you want to be as successful as possible.
- Use shorter EMAs for faster trades, and longer EMAs for stability: Remember, shorter EMAs are best for faster trades, while longer EMAs are best for stability.
- Confirm EMA signals with price action and volume: Don’t just look at the EMA for your entry and exit points. Price action and volume are also critical for confirmation, providing a clearer picture of market strength and the likelihood that a trend will continue.
- Avoid trading EMA crossovers in sideways markets: EMA has its limitations, especially in sideways markets where frequent price fluctuations can trigger false crossovers and unreliable signals. Recognizing cognitive biases in trading reduces the chance of acting on false signals during choppy conditions.
- Backtest settings before going live: Remember to backtest your settings before you go live, ensuring you understand how your EMAs react in different market conditions and what kind of signals to expect under real trading scenarios.
Is an EMA strategy right for you?
While the EMA strategy is best suited for day or swing traders who want early signals, it can also be ideal for momentum traders or any active trader who needs to quickly react to short-term price movements. As we mentioned, the key is to practice using an Exness demo account to fine-tune EMA periods and discover if it’s really a worthwhile tool to add to your trading arsenal.
Make smarter trading decisions
Use expert analysis and tools on demo accounts or a live account.
Key takeaways
- The EMA indicator gives more weight to recent price data. Unlike the Simple Moving Average (SMA), the Exponential Moving Average (EMA) reacts faster to price movement because it places greater emphasis on the most recent data points rather than treating all prices equally.
- The EMA formula helps traders calculate a responsive average. By applying a smoothing factor, the EMA formula prioritizes recent prices while still reflecting the asset’s overall trend direction—a crucial step for technical traders who want to generate timely buy and sell signals.
- EMA indicators are ideal for tracking short- and long-term trends. Shorter EMAs focus on quick price fluctuations and intraday momentum, while longer EMAs, like the 200-period line, help long-term traders identify market trends and major support or resistance levels.
- Moving average crossover strategies help identify trading opportunities. When one EMA line crosses another—for example, a 9-period crossing a 21-period—traders can interpret it as a buy or sell signal depending on the crossover direction.
- The exponential moving average EMA reduces lag compared to traditional averages. Because the EMA places greater weight on recent data, it responds faster to price changes, making it more suitable for active traders in volatile markets compared to lagging indicators like the simple moving average SMA.
- EMA crossovers should be confirmed with other technical indicators. Tools such as the Relative Strength Index (RSI) or Moving Average Convergence Divergence (MACD) can help filter out false signals and confirm whether a trend reversal or continuation is genuine.
- EMAs can act as dynamic support or resistance in trending markets. In price charts, the EMA line often shows where an asset’s price finds temporary support in an uptrend or meets resistance in a downtrend, helping traders anticipate potential entry or exit points.
- Adjusting the EMA smoothing factor changes sensitivity to recent data. A higher smoothing factor gives greater weight to the most recent price data, while a lower factor averages past prices more evenly, making the indicator smoother but less reactive to future price movements.
- Backtesting EMA-based trading strategies is essential for risk management. Testing the moving average indicators across various historical data helps traders understand how the EMA reacts under different market conditions, improving strategy accuracy and reducing risk in financial markets.
Final thoughts on mastering EMA trading
If you take the time to experiment with the settings to match your style, there’s every chance you can transform EMA into a powerful tool for your individual trading journey. Its responsiveness to trends, reversals, and crossover strategies is simple yet effective, and when combined with other indicators like RSI, it can be the perfect complement to enhance the accuracy of your entries and exits. But you won’t know this until you try it out in a risk-free environment on a demo account, and practice consistently to learn how it performs.
Share:
Related


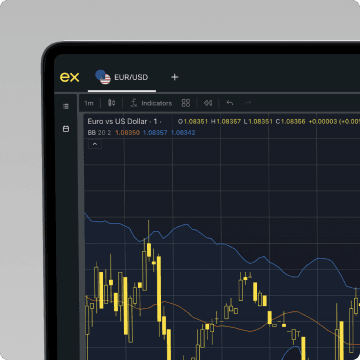
Exness Trade app
Trade with confidence anytime, anywhere.


Get the app
App title

Trading is risky. T&Cs apply.


